
How to Hang a Boxing Bag in 7 Easy Steps
To hang a boxing bag in 7 easy steps, first locate sturdy ceiling joists and make sure they can support the bag’s weight. Gather the right tools and hardware, then mark the joists clearly.
Next, cut and pre-drill a support board, attaching it securely across the joists for extra strength. Install a heavy-duty hanger and tighten the bolts firmly.
Finally, hang your bag with enough clearance around it and check all connections for safety. Follow these steps, and you’ll have your bag set up reliably for great workouts.
Evaluate Ceiling Joists and Choose Punching Bag Location
To hang your boxing bag securely, start by locating the ceiling joists with a stud finder or by visually inspecting the ceiling. These joists provide the essential support needed to hang the punching bag safely.
Make sure the ceiling joists are spaced about 16 inches apart and sound solid when you tap them. This shows they can handle the weight of the bag.
Next, choose a location that offers at least 1.5 meters of clearance around the bag. This space lets you move freely without hitting walls or obstacles, reducing the risk of injury.
Gather Tools and Punching Bag Hanging Supplies
A secure installation starts with gathering the right tools and supplies for hanging your punching bag.
First, make certain you have a punching bag with attaching hardware or a sturdy bag hanger. You’ll need a drill equipped with a ¼ inch drill bit and a ½ inch socket drill adapter to handle mounting tasks efficiently.
Collect mounting hardware, including screws and a ceiling hook rated for heavy loads. Prepare a 2×10 lumber board cut to 40 inches to reinforce the mounting area and provide extra support.
Don’t forget a tape measure and a pencil to mark precise measurements.
For better bag movement, consider adding heavy-duty springs or chains. Having these tools and supplies ready guarantees a smooth, safe setup for your punching bag.
It really makes the whole process easier and safer.
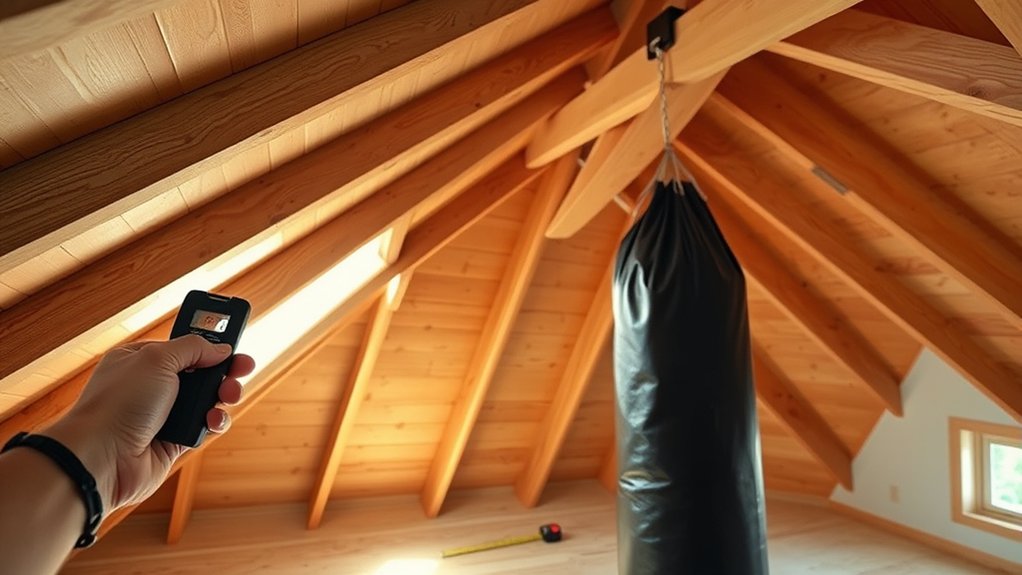
Locate and Mark Ceiling Joists for Mounting
Once you’ve gathered all the necessary tools and supplies, the next step is to locate the ceiling joists where you’ll mount your punching bag. Use a stud finder or knock on the ceiling to locate the joists, which are usually spaced 16 inches apart. Mark the center of each joist with a pencil to guarantee precise mounting.
Make certain the joists you mark can support at least four times the punching bag’s weight for safety. Measure the bag’s height and position to avoid hitting walls or furniture. Double-check your marks before drilling to avoid unnecessary holes.
| Step | Action |
|---|---|
| 1 | Locate joists with stud finder |
| 2 | Knock ceiling to confirm |
| 3 | Mark joist centers clearly |
| 4 | Check weight support capacity |
| 5 | Verify marks before drilling |
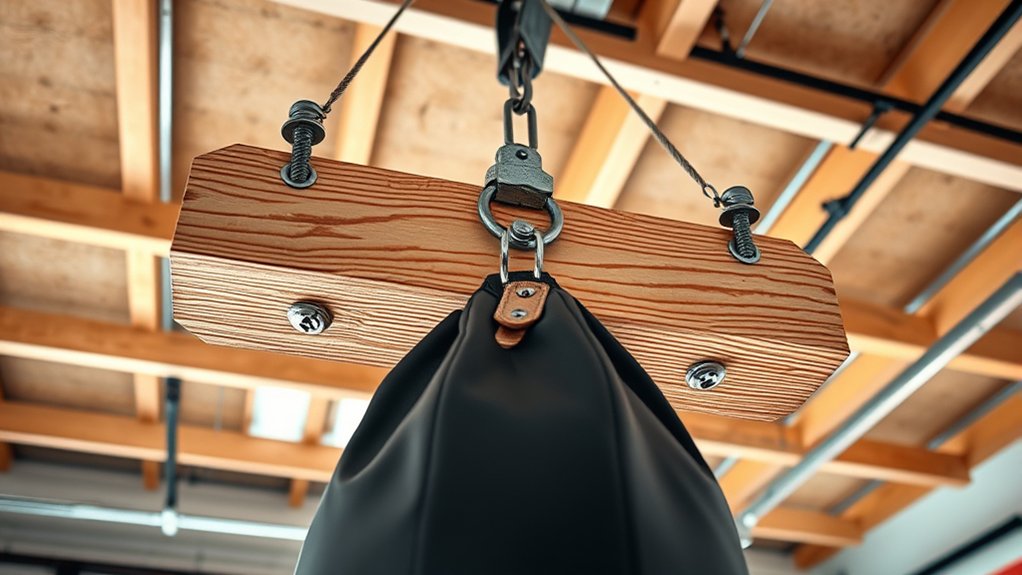
Cut and Prepare a Support Board for Extra Strength
Because the punching bag will exert significant force, you’ll need to cut a 2×10 board to 40 inches and attach it across multiple ceiling joists.
Start by measuring and marking the board carefully, ensuring it spans at least two joists to distribute weight evenly. When you cut a 2×10 board to size, it creates a stable support structure that can handle the bag’s stress.
Next, pre-drill mounting holes along the board where it will meet the joists; this prevents the wood from splitting and makes installation easier.
Pre-setting screws into the board beforehand also speeds up securing it to the ceiling. Preparing this support board properly is essential for a safe, durable mount that holds your boxing bag firmly in place.
Attach Support Board Securely to Ceiling Joists
First, you’ll want to locate the strongest ceiling joists. You can do this by using a stud finder or by carefully inspecting the ceiling. This step is important because your support board needs a solid anchor to hold the weight safely.
Next, take some heavy-duty screws that are designed to handle the weight of your boxing bag and securely fasten the board to the joists. It’s a good idea to double-check that everything is level and tightly attached before you move on.
Once you’re confident the board is firmly in place, you can go ahead and hang your boxing bag. This way, you’ll ensure it stays secure and safe while you train.
Selecting Strong Joists
Before you hang your boxing bag, you need to find strong ceiling joists that can handle the weight safely. Use a stud finder to locate solid wooden beams spaced about 16 inches apart. These joists should be strong enough to support at least four times the bag’s weight.
To distribute the load evenly, you’ll want to attach a support board like a 2×10 lumber securely to the ceiling, spanning across multiple joists. Pre-drill holes to avoid splitting the wood, then use high-quality screws rated for heavy loads to fasten the board firmly.
This guarantees the structure can hold the punching bag without risk. Taking these steps assures that when you attach the punching bag, it’ll hang safely and securely for long-term use.
It’s really about making sure everything is solid so you can focus on your training without worries.
Securing The Support Board
When securing the support board, make certain you measure the distance between the ceiling joists to confirm they’re spaced at least 16 inches apart. This spacing guarantees the 2×10 support board can provide the necessary strength to hold your boxing bag safely.
Before you attach the board, check the ceiling joists for stability by knocking on them to verify they’re solid.
Drill pilot holes through the board aligned with the joists to keep everything secure and safe. Use heavy-duty screws designed to support the load capacity of your punching bag, making sure they penetrate the joists by at least 1.5 inches.
Finally, attach the support board firmly, making certain it’s level and stable to prevent any risk of falling or damage during use.
Using Proper Fasteners
Although securing the support board is essential, using the proper fasteners is what truly guarantees your boxing bag stays safely mounted. To hang a punching bag securely, select screws rated for your bag’s weight, making sure they penetrate the ceiling joists by at least 1.5 inches.
Pre-drill holes in the support board to avoid wood splitting and simplify installation. Attach the support board firmly across at least two ceiling joists to evenly distribute the load.
Use a level to keep the board straight, preventing uneven stress on the wall mount and fasteners.
Once installed, regularly check the support board and fasteners for stability. Taking these steps guarantees your boxing bag remains secure and safe during every workout.
Install Punching Bag Hanger and Mounting Hardware
Now that your support board is firmly in place, it’s time to install the punching bag hanger.
First, make sure you position the hanger exactly where you want the bag to hang. This step is important because you want the bag to be at the perfect height and spot for your workouts.
Next, use heavy-duty hardware that’s rated for the bag’s weight. Don’t skimp on this part—it’s crucial for safety and durability.
Once you’ve got everything lined up, tighten all the bolts and screws securely. You want to make sure the hanger won’t shift or come loose while you’re using it. That way, you can focus on your training without any worries.
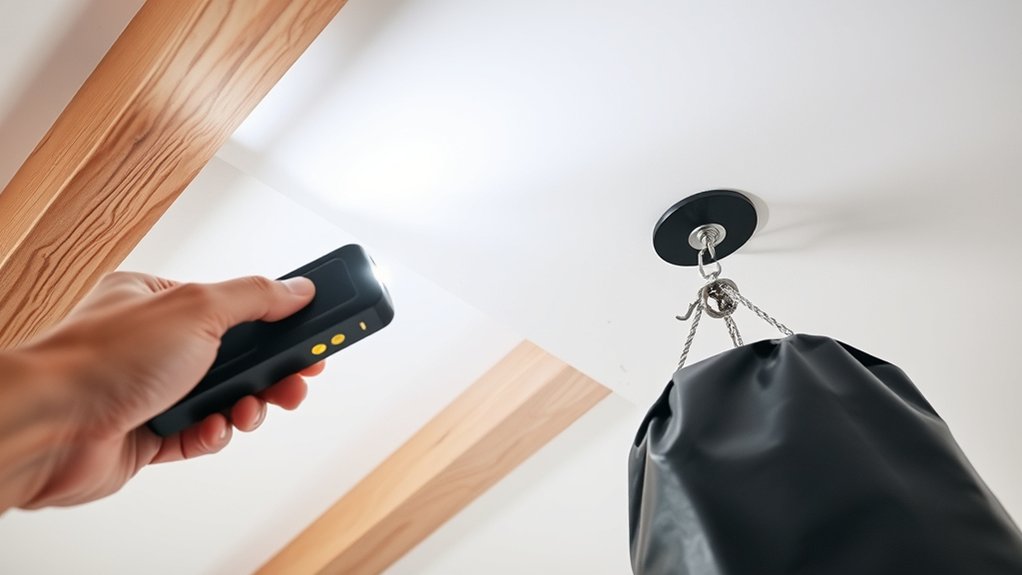
Secure Hanger Placement
Before you install the punching bag hanger, make sure to locate and mark the ceiling joists carefully. These joists provide the sturdy support needed to hold the bag’s weight. For secure hanger placement, attach a 2×10 board to these joists to add stability.
Pre-drill holes using a ¼ inch drill bit to prevent wood splitting. Align the hanger’s holes with the board and fasten it with lag bolts. If your space lacks ceiling joists, you might want to consider a wall bracket or a punching bag stand.
When mounting on masonry, use concrete anchors for a secure hold. Regularly inspect the hardware to keep your heavy bag safely suspended. It’s all about making sure everything stays solid and safe while you train.
| Mount Type | Recommended Hardware | Notes |
|---|---|---|
| Ceiling Joist | Lag bolts, 2×10 board | Best for heavy bags |
| Wall Bracket | Concrete anchors | For solid walls only |
| Punching Bag Stand | N/A | Portable, no drilling needed |
| Masonry Wall | Concrete anchors | Use for brick or concrete walls |
Proper Hardware Installation
After securing the hanger placement by attaching a sturdy 2×10 board to the ceiling joists, focus on installing the punching bag hanger and mounting hardware correctly.
Choose a hanger rated to support at least four times your punching bag’s weight to guarantee the bag is secure.
Pre-drill holes in the 2×10 board using a ¼ inch drill bit. Make sure to drill into solid wood or ceiling joists, not drywall.
Align the punching bag hanger with these holes, then fasten it using lag bolts for a secure attachment.
Use a socket adapter to tighten bolts efficiently.
Once installed, hang your punching bag and regularly inspect the mounting hardware and attachment points. This way, you’ll ensure your bag remains safely suspended and ready for every workout.
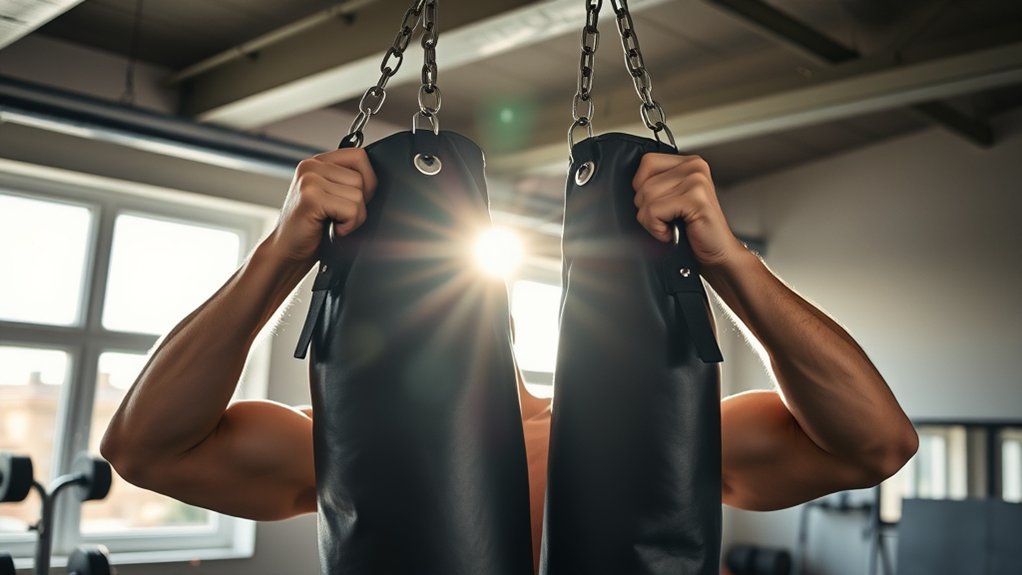
Hang Punching Bag and Confirm Stability and Safety
Securely attaching your punching bag is essential for your safety and effective training. To hang a boxing bag properly, first verify the ceiling joists or beams have the structural integrity to support at least four times the bag’s weight.
Use mounting hardware like lag bolts or screws rated for the load, guaranteeing secure attachment.
Hang the bag straight with a level to allow proper movement and reduce strain. Make sure to maintain a minimum clearance of 1.5 meters around the bag. This space lets the bag swing freely and helps prevent accidents.
After installation, regularly inspect the mounting hardware and attachments for wear or looseness. Taking these steps ensures your punching bag stays stable, safe, and ready for every workout session.
It’s all about keeping things secure so you can focus on your training.
Frequently Asked Questions
What Type of Boxing Bag Is Best for Beginners?
For beginners, choosing the right heavy bag type depends on your training goals. A freestanding bag offers convenience and easy setup. It’s perfect if you don’t want to hang it.
When deciding between canvas vs vinyl, vinyl bags tend to be more durable and easier to clean. Stick with bag weight recommendations around 40 to 70 pounds. This helps build strength without injury.
While speed bag benefits improve hand-eye coordination, start with a heavy bag for foundational skills. It’s a great way to get your basics down before moving on.
How Often Should I Inspect the Hanging Hardware?
You should inspect your hanging hardware at least once a month.
Don’t wait until something feels off. Regular checks are key for safety and help you catch wear and tear early.
Follow maintenance guidelines to tighten bolts and check the weight capacity.
It’s also smart to stick to installation best practices. After every intense session, do a quick evaluation.
This proactive approach keeps your bag secure and your workouts safe.
It’s all about staying ahead and making sure everything holds up well.
Can I Hang a Boxing Bag Outdoors Safely?
Yes, you can hang a boxing bag outdoors safely by following some key installation tips.
Start by choosing a sturdy support like a solid beam or a heavy-duty wall mount. Make sure there’s enough space around the bag—at least 1.5 meters all around.
Also, use weather-resistant materials like rust-proof chains and hooks to help your setup last longer.
It’s a good idea to regularly check and maintain both the hardware and the bag. This way, you can prevent wear and keep everything secure and working well.
What Flooring Is Best Under a Boxing Bag?
You want to use rubber mats or interlocking foam tiles under your boxing bag because they help with weight distribution and protect your joints.
Hardwood floors aren’t ideal unless you add a protective mat since they can get scratched. Concrete surfaces work well for durability, but adding mats reduces noise and vibration.
Avoid carpet padding since it wears out quickly and doesn’t offer enough stability or support for your bag’s weight.
Using the right flooring makes a big difference in both safety and comfort while training. So, go for mats that can handle the impact and keep your floor safe.
How Do I Maintain My Boxing Bag’s Longevity?
Think of your boxing bag as a trusted partner. It needs your care to stay strong.
You maintain its longevity through proper cleaning with mild soap, regular inspections for wear, and correct storage in a cool, dry spot to avoid moisture damage.
Use protective covers and rotate the bag to guarantee even weight distribution.
These steps shield it from harm and let your bag endure every punch and session with resilience. Just a little attention goes a long way!
Conclusion
Now that you’ve followed these steps, hanging your boxing bag is a piece of cake. With the right tools and careful preparation, you’ve set up a safe and sturdy spot to train hard.
Remember, measure twice and hang once. This guarantees your bag stays put through every punch and kick.
So get ready to throw some serious punches without a worry. You can trust your setup to take a beating just like you.


