
How to Fill a Boxing Bag in 7 Easy Steps
To fill your boxing bag, first choose your filling. Clothes work great for softness, while sand or pea gravel add weight.
Get your materials ready by cutting fabric into strips and removing any hard parts. Unzip your bag and make sure to clear out any metal inside.
Next, layer the fillings tightly to avoid gaps. If you’re using sand, put it in bags before adding it to the bag. Seal the bag securely with the zipper and reinforce it if needed.
Test the bag’s stability and adjust the weight as you go along. Keep following for tips on customizing your bag’s feel and durability.
Compare Boxing Bag Filling Options and Benefits
When choosing how to fill your boxing bag, you’ll want to weigh factors like noise and stability.
Water-filled bases offer flexibility and bounce, but they can be noisy in apartments due to water movement. Sand is a quieter, more stable option, requiring about 300 pounds of industrial dry sand to provide solid support.
Water-filled bases flex and bounce but can be noisy; sand offers quieter, stable support with about 300 pounds needed.
Pea gravel starts at around 150 pounds and adds stability, but shifting rocks may increase noise.
No matter which filling you pick, the bag ring plays an essential role in minimizing rocking motion and enhancing stability. Your choice depends on whether you prioritize noise reduction or a solid, stable feel.
Understanding these pros and cons helps you tailor your punching bags to fit your training environment and preferences perfectly.
It’s all about finding what works best for you and your space.
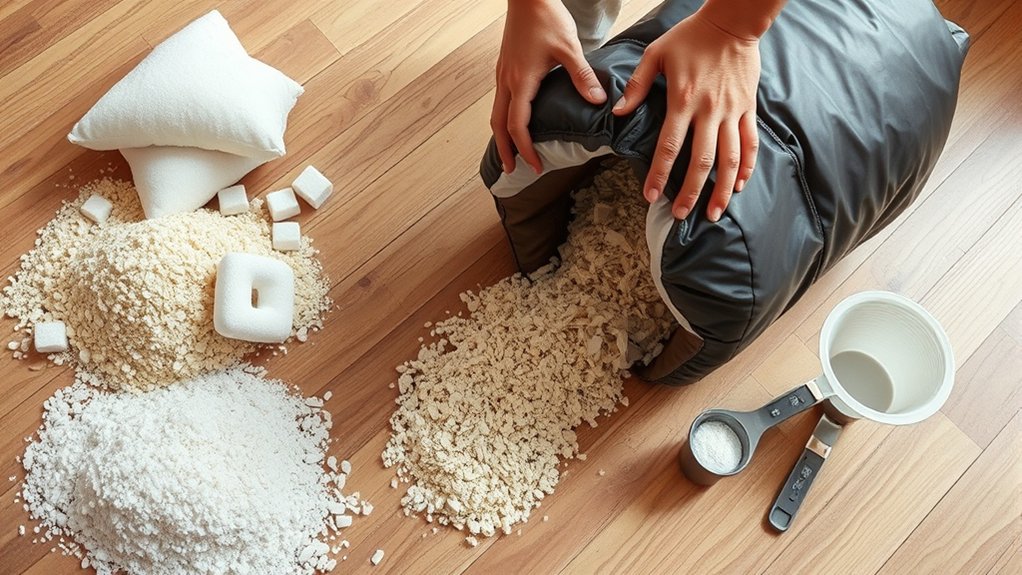
Prepare Your Boxing Bag Filling Materials Safely
Preparing your boxing bag filling materials safely starts with selecting lightweight items like clothes or scrap fabric. Cut these into small strips to increase density and prevent tearing.
Make sure to remove any buttons, zippers, or metal pieces from the fabric to avoid damage or injury.
You can combine sand or sawdust with the fabric for added weight. Just be sure to use resealable bags for these materials.
Wrapping the bags with duct tape helps enhance durability and prevent leaks.
Weigh the filling to match the ideal ratio, about 0.5 pounds of filling per 1 pound of your body weight.
Finally, store all filling materials in a dry area. This will help avoid moisture damage that could affect the bag’s longevity.
Open and Ready Your Boxing Bag for Filling
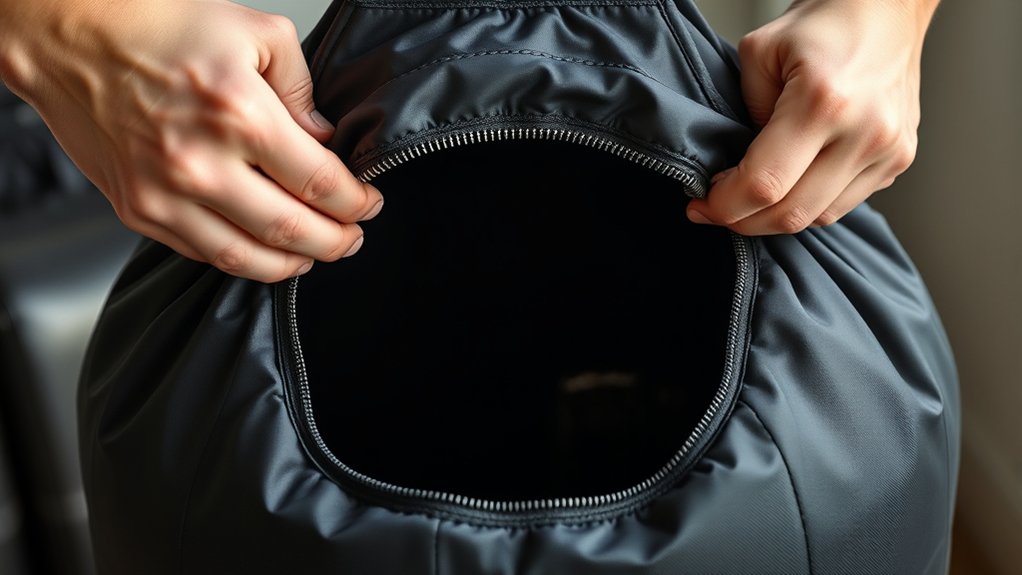
To get your boxing bag ready for filling, unzip the top opening to access the compartment inside.
Before adding any filling, make sure to remove all metal parts. This helps prevent damage during use.
Remove all metal parts before filling to avoid damage and ensure safe use of your boxing bag.
If you plan on filling the bag with water, be certain it’s designed for that purpose. You don’t want to risk any leaks.
Get your filling materials ready—whether it’s clothes, sand, or sawdust.
Use resealable bags for sand or sawdust to keep moisture and wear away from the bag.
Keep a long tool nearby to help pack down each layer tightly as you fill. This makes sure the bag holds its shape and performs well.
Taking these steps gives you a solid foundation before you move on to adding and packing the filling properly.
Layer and Pack Filling to Avoid Empty Spaces
Although filling your boxing bag might seem straightforward, layering and packing each section carefully is vital to prevent empty spaces that can affect its performance.
Start by adding a stable base layer using clothes or bags of sand or sawdust. Use a long stick or rod to firmly pack down this layer, eliminating gaps. Keep doing this as you add more layers, packing each one firmly as you go, until you reach your desired height.
Be sure to space sand or sawdust bags evenly throughout the bag for balanced weight distribution and to avoid shifting during use. Regularly check your work to make sure the filling stays tight, and adjust as needed.
This method keeps your bag dense and stable, which helps with durability and gives you a consistent training experience. It really makes a difference in how your bag performs over time.
Close and Seal Your Boxing Bag Securely
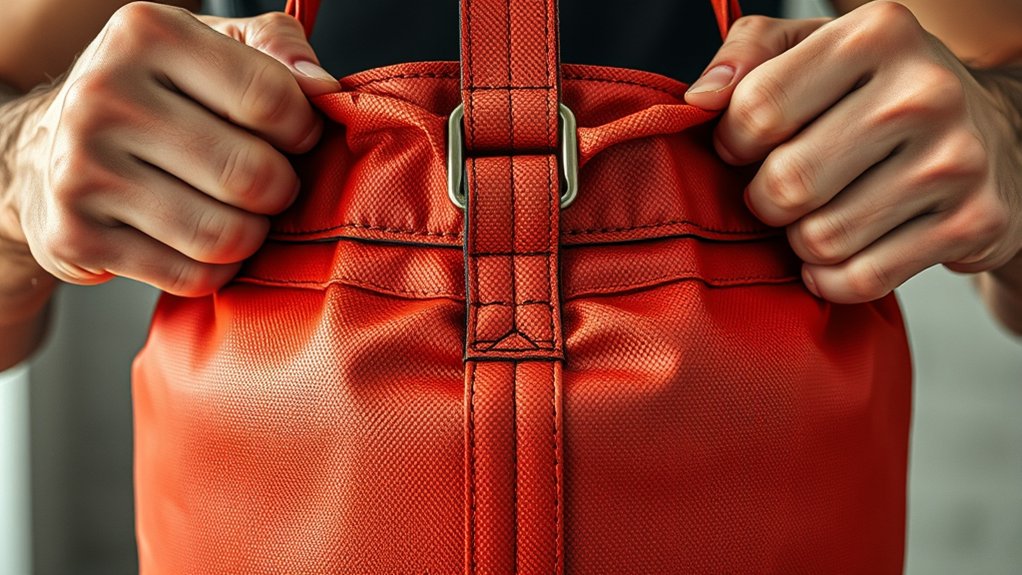
Once you’ve filled your boxing bag to the right weight and density, make certain you close it securely to keep the filling from spilling out during use.
Keep in mind, carefully zip or fasten the opening, checking the zipper or closure for any damage that might cause it to open unexpectedly.
For extra durability, especially if you’ll be hitting the bag hard, reinforce the closing area with duct tape.
Also, sealing the bag completely helps prevent moisture from entering, which can damage the filling over time.
After every session, inspect the closure to verify it remains intact and secure.
Taking these steps will help maintain your bag’s performance and prolong its life, so don’t skip this essential final step.
Test Your Filled Boxing Bag for Stability
Give your filled boxing bag a few solid punches to check its stability. If the bag is swaying excessively or tipping over, it means the weight distribution inside isn’t even. You want a bag that’s balanced so it stays upright and absorbs strikes properly.
Watch for any shifting or settling of the filling materials over time. This can cause instability. If you notice issues, adjust the filling by redistributing or adding weight until the bag is firm and secure.
Also, regularly inspect the bag’s surface for tears or weak spots that could affect stability during workouts.
Keeping your boxing bag stable guarantees a safer and more effective training session every time you step up to it.
Adjust Boxing Bag Weight for Your Training Goals
When you adjust your boxing bag’s weight, you tailor your training to your specific goals and skill level. For beginners, aim for a total weight of 80-90 pounds to focus on speed and technique.
Experienced boxers should consider a bag closer to their body weight for power and strength development.
Weight considerations are essential: use about 0.5 pounds per pound of your body weight to strike a balance. Always monitor weight distribution inside the bag to avoid uneven filling, which can cause injury.
As your skills and fitness improve, regularly adjust the filling to match your evolving training needs. This guarantees your sessions remain effective and safe, helping you build both technique and power efficiently.
Just keep an eye on how the bag feels and make changes as you go. That way, you’ll get the most out of every workout.
Frequently Asked Questions
How Often Should I Refill or Replace the Filling in My Boxing Bag?
You should check your boxing bag’s filling every 3-6 months to see if it feels lighter or less dense.
If it does, go ahead and refill it to maintain the right weight and resistance. This way, your workouts stay effective and consistent.
It’s also a good idea to replace the filling entirely every 1-2 years.
Doing this helps avoid wear and keeps your training experience consistent.
Keep an eye out for any tears or weak spots in the bag.
And remember, you can adjust the filling based on your training goals to get the best performance from your bag.
Can I Use Household Items as Filling Materials Safely?
You can definitely use household alternatives to fill your boxing bag safely. Think of it like turning everyday items into your secret weapon. Just make sure you remove buttons, zippers, or anything metal to avoid damage.
Cut old clothes or fabric into small strips for better density.
Combining these with sand or sawdust in sealed, taped bags adds weight and stability. This way, you get a durable, safe filling without spending extra cash.
What Is the Best Method to Clean the Inside of a Boxing Bag?
The best cleaning techniques for your boxing bag’s interior start by unzipping it and removing all filling.
Use a damp cloth with mild soap to wipe away dirt and sweat buildup thoroughly. After cleaning, let it dry completely to avoid mold.
You can also spray a disinfectant safe for the material to kill bacteria and odors.
Regularly doing this keeps your bag fresh and extends its lifespan. It’s pretty simple once you get into the habit of it!
How Do Temperature Changes Affect the Filling Material?
Temperature impact on your boxing bag’s filling is like a dance with the seasons.
You’ll notice sand or sawdust settling or compacting as temperatures fluctuate, which changes the bag’s weight distribution.
In the cold, moisture in fabric fillings might freeze. This stiffens the bag and dulls its shock absorption.
Heat causes expansion or contraction, altering how the bag feels and its weight.
These shifts affect your training’s effectiveness.
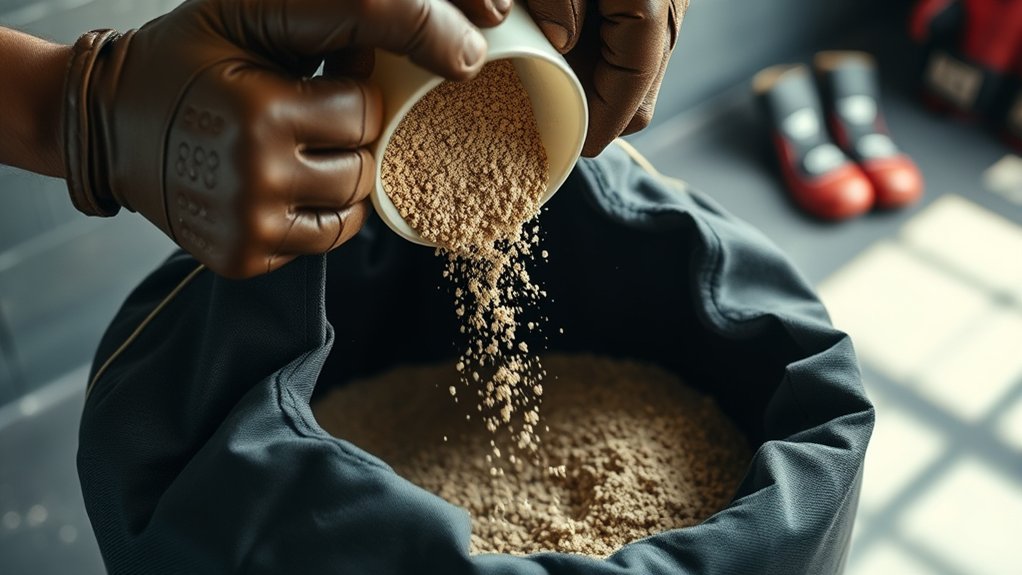
Is It Necessary to Wear Gloves While Filling the Boxing Bag?
Yes, glove necessity is important when filling a boxing bag. You’ll protect your hands from sharp edges, rough materials, and potential irritants like dust or allergens.
Gloves give you a better grip, making the process easier and more efficient. Plus, if you’re handling heavy fillers like sand, gloves help reduce strain on your wrists and hands.
Wearing gloves keeps you safe and comfortable throughout the job. It’s definitely worth putting them on before you start.
Conclusion
Now that you’ve filled your boxing bag step by step, you’re ready to throw punches like a pro. Remember, a well-packed bag is worth its weight in gold. It gives you the right resistance and durability for every workout.
Keep testing and adjusting the weight to match your training goals. You’ll be knocking out your sessions with ease. Stick with these steps, and you’ll have a solid training partner for the long haul!


